Self-hosted GitHub
Configuring a Github application
Before connecting your private Github instance, make sure you have an application configured. If you haven't yet configured one, you can do it now by following the steps described below.
-
Access your Github account.
-
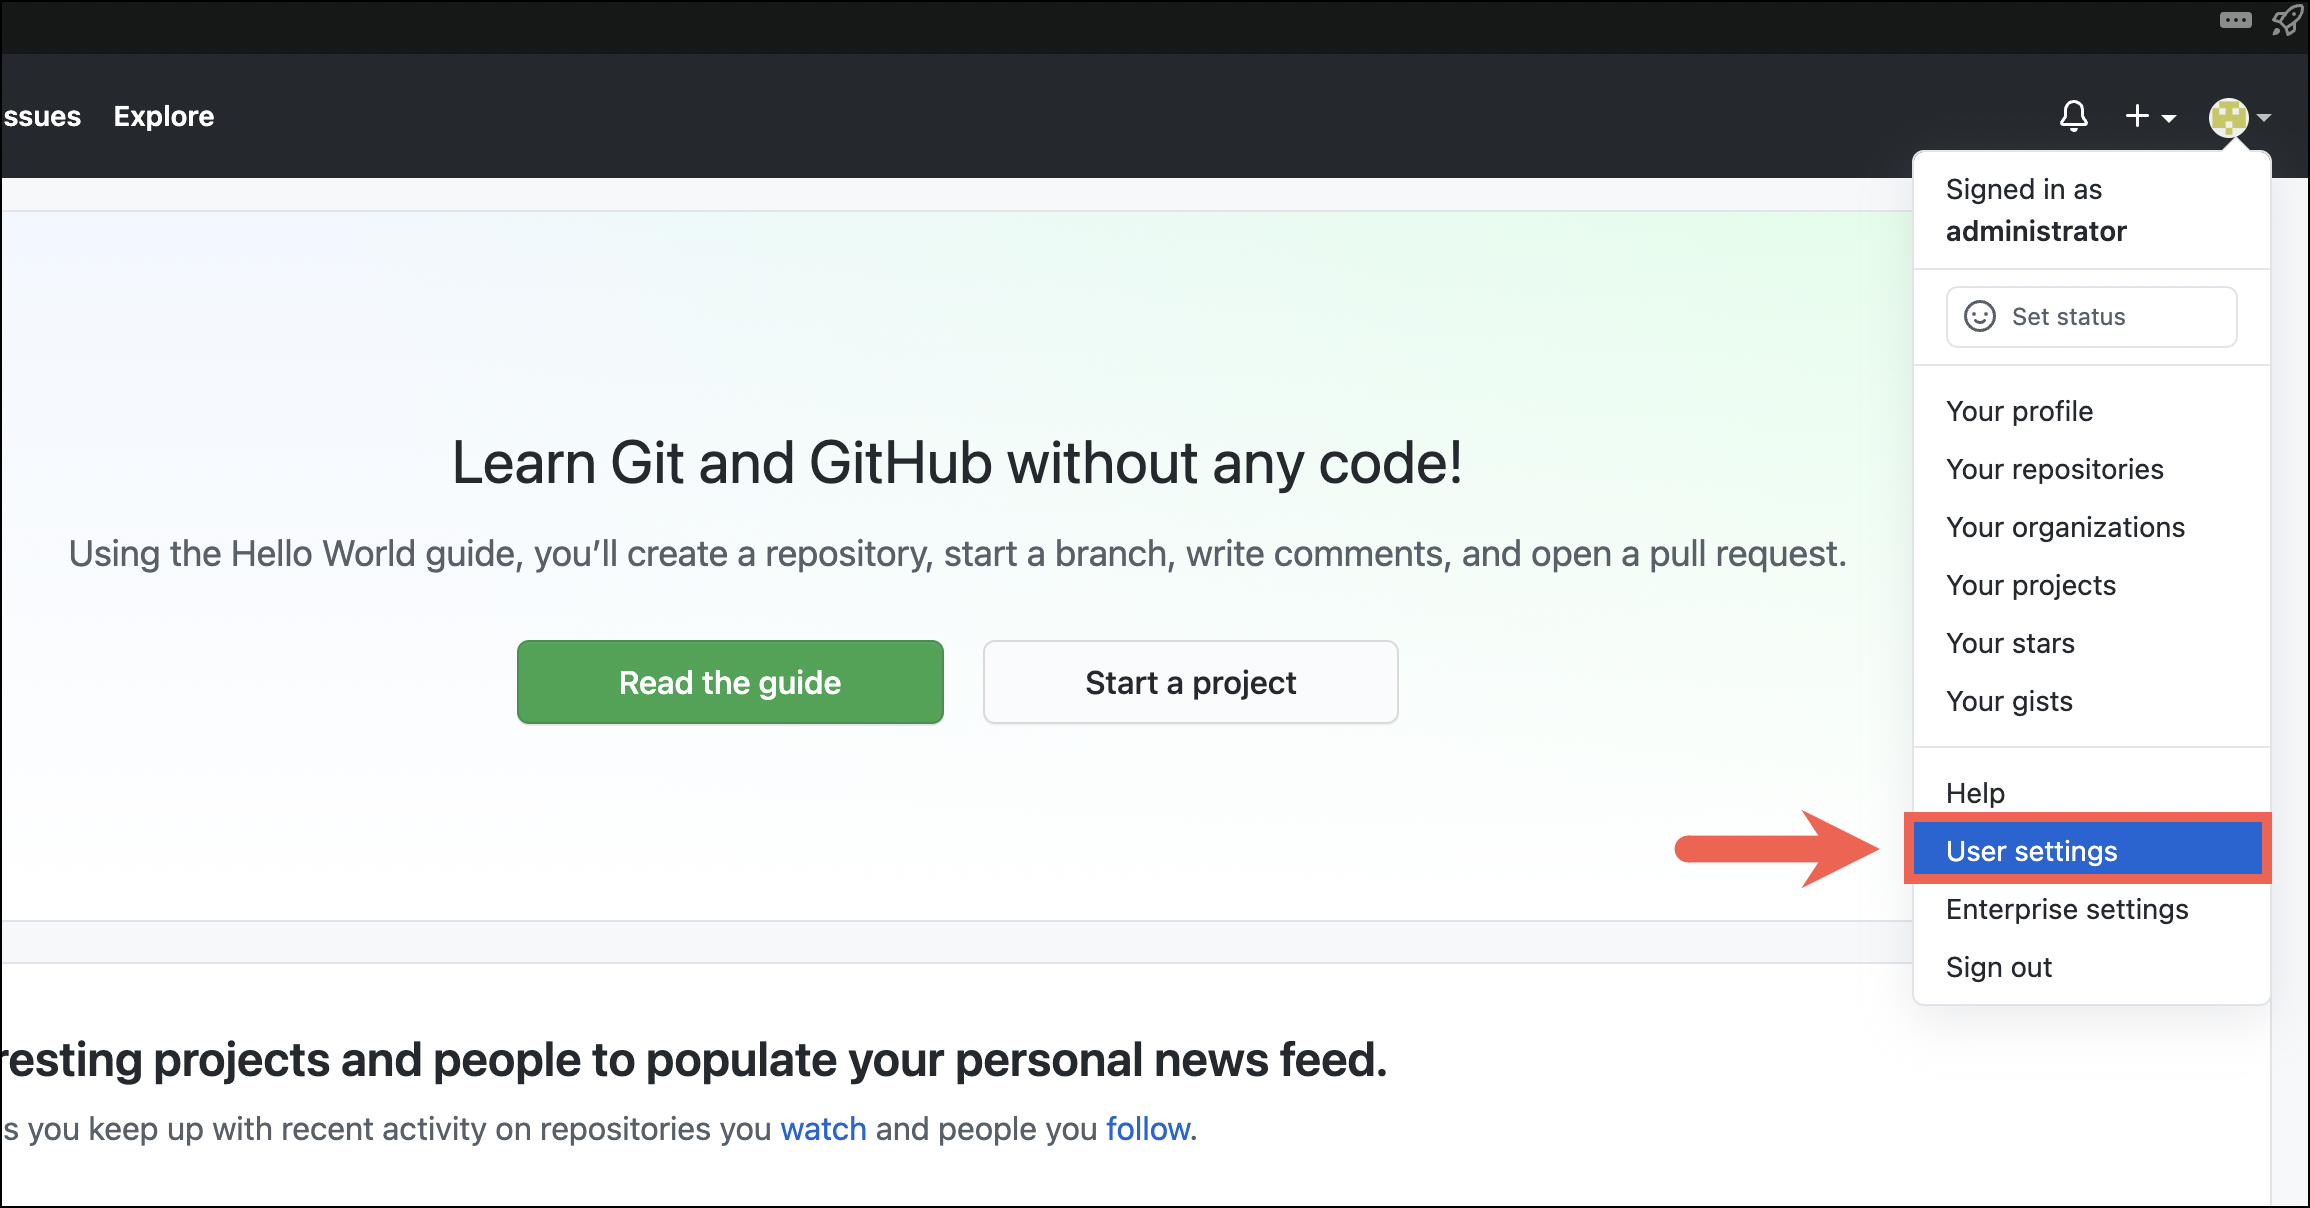
Click on your profile icon in the upper-right corner and select User Settings.

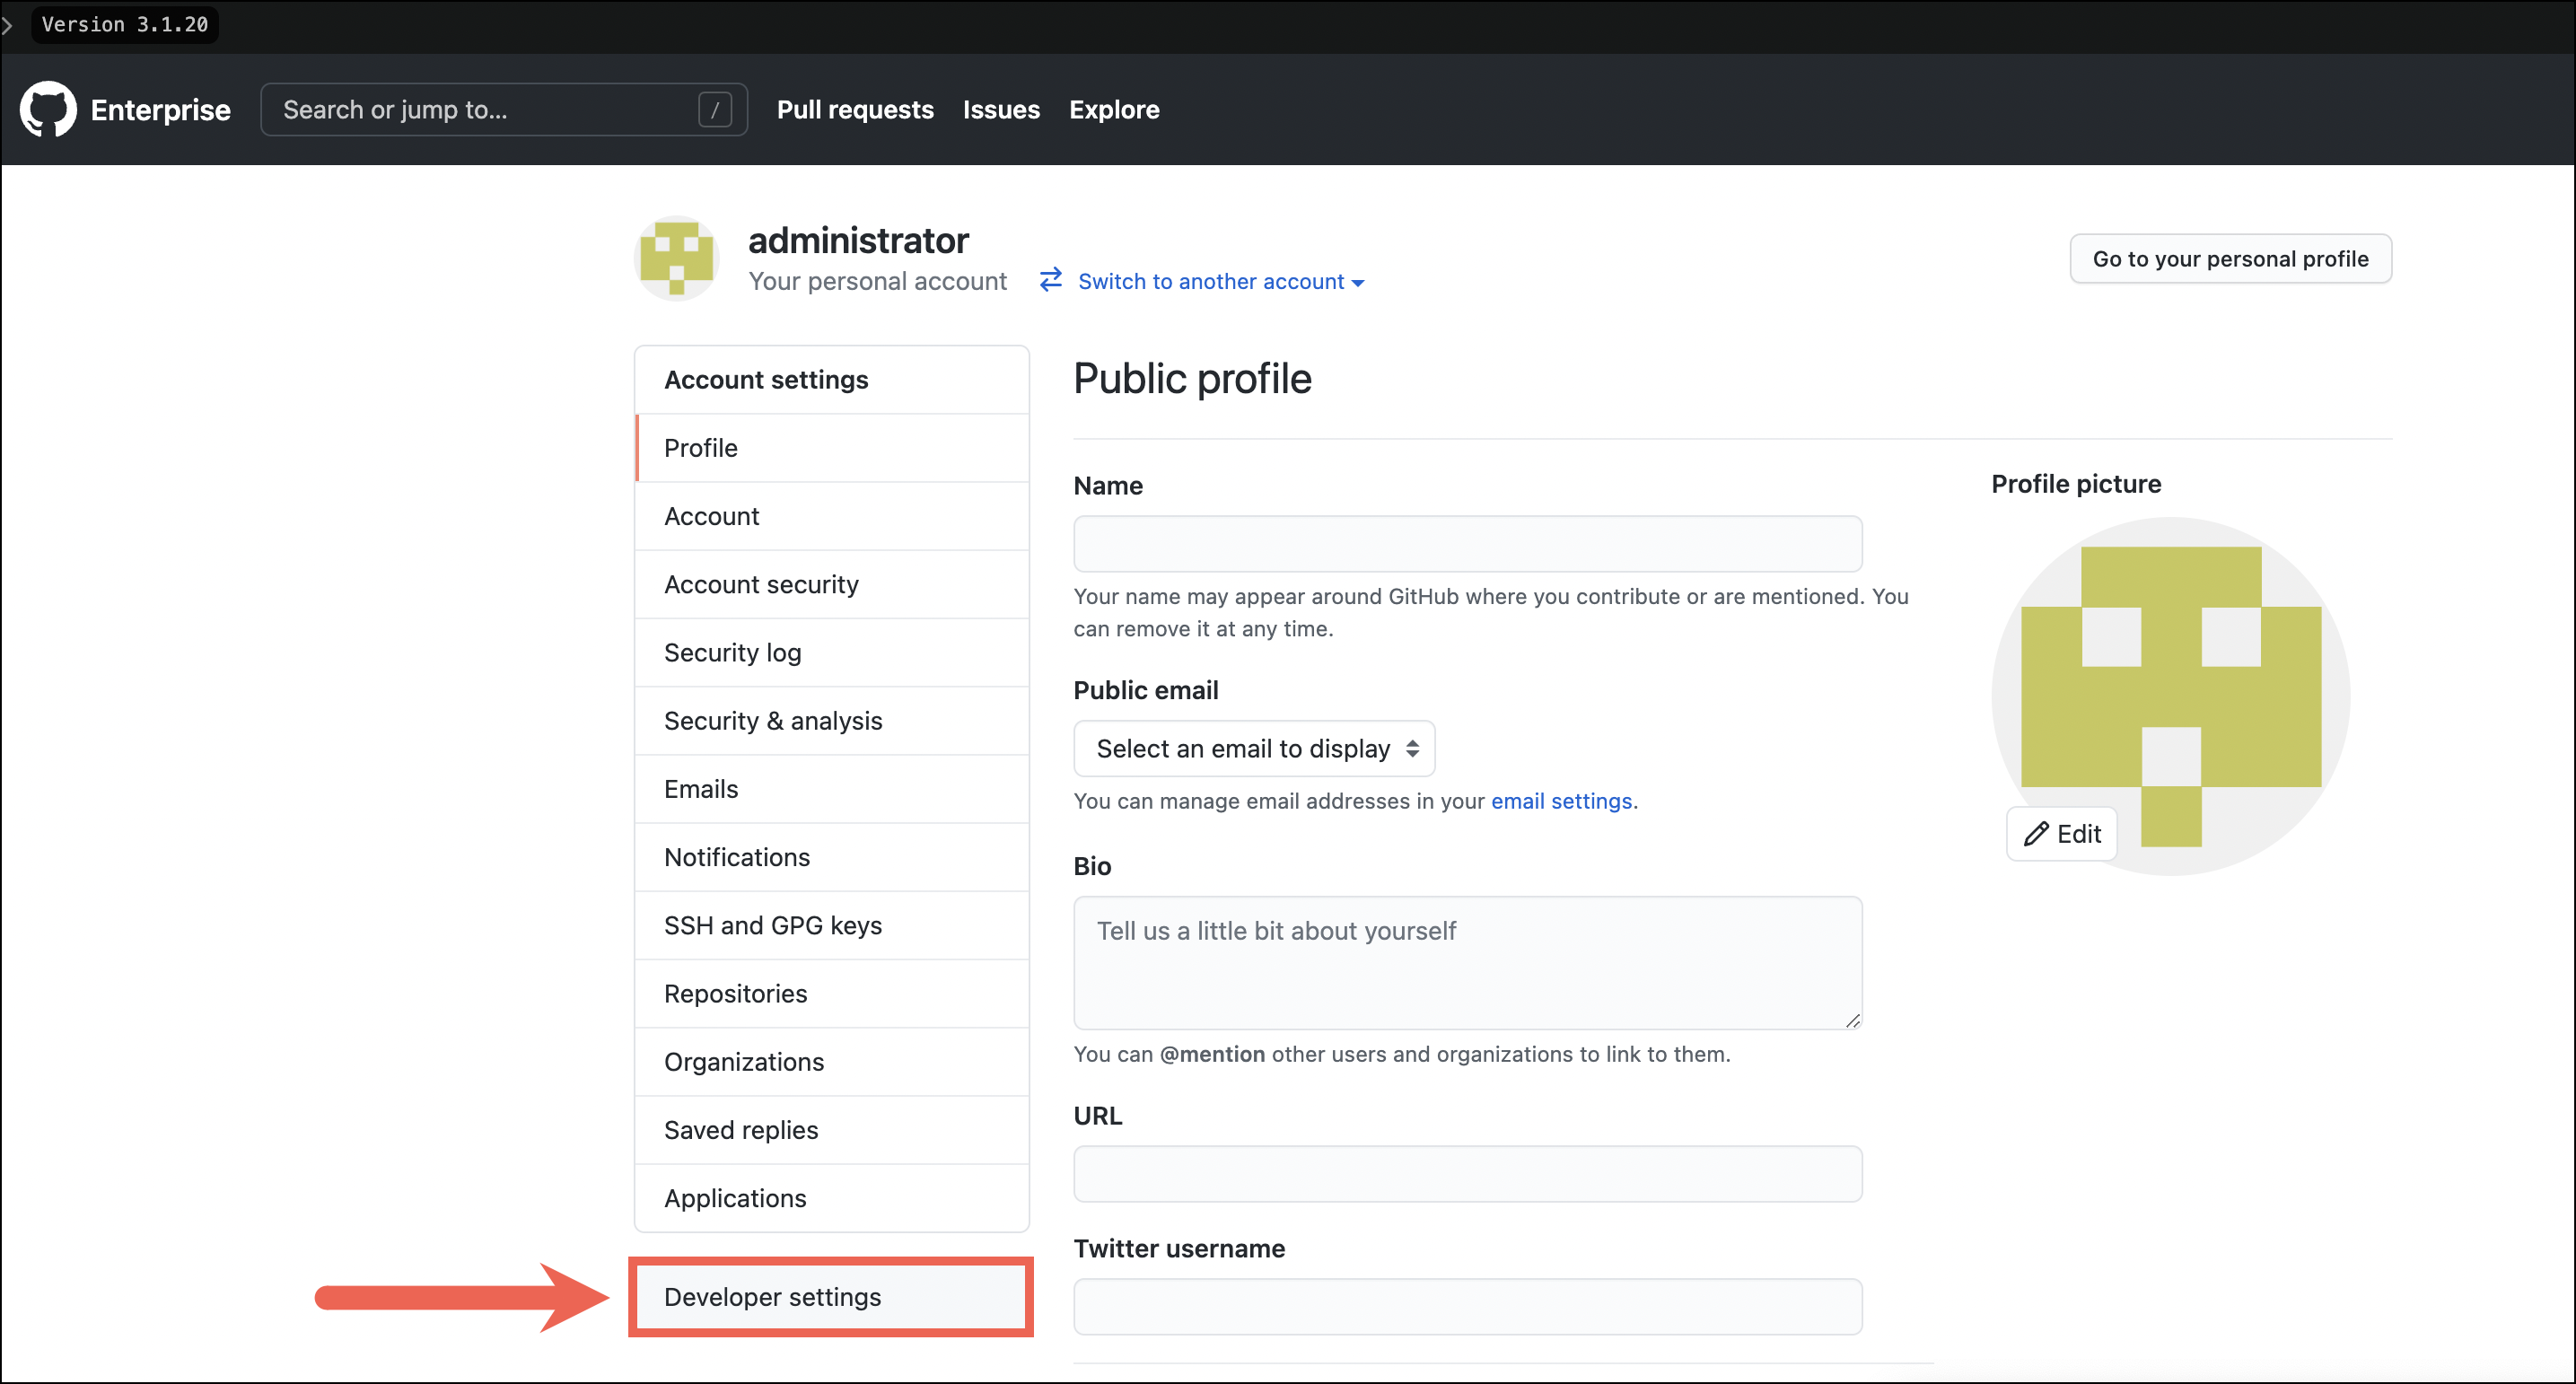
- On the left-side menu, select Developer settings.

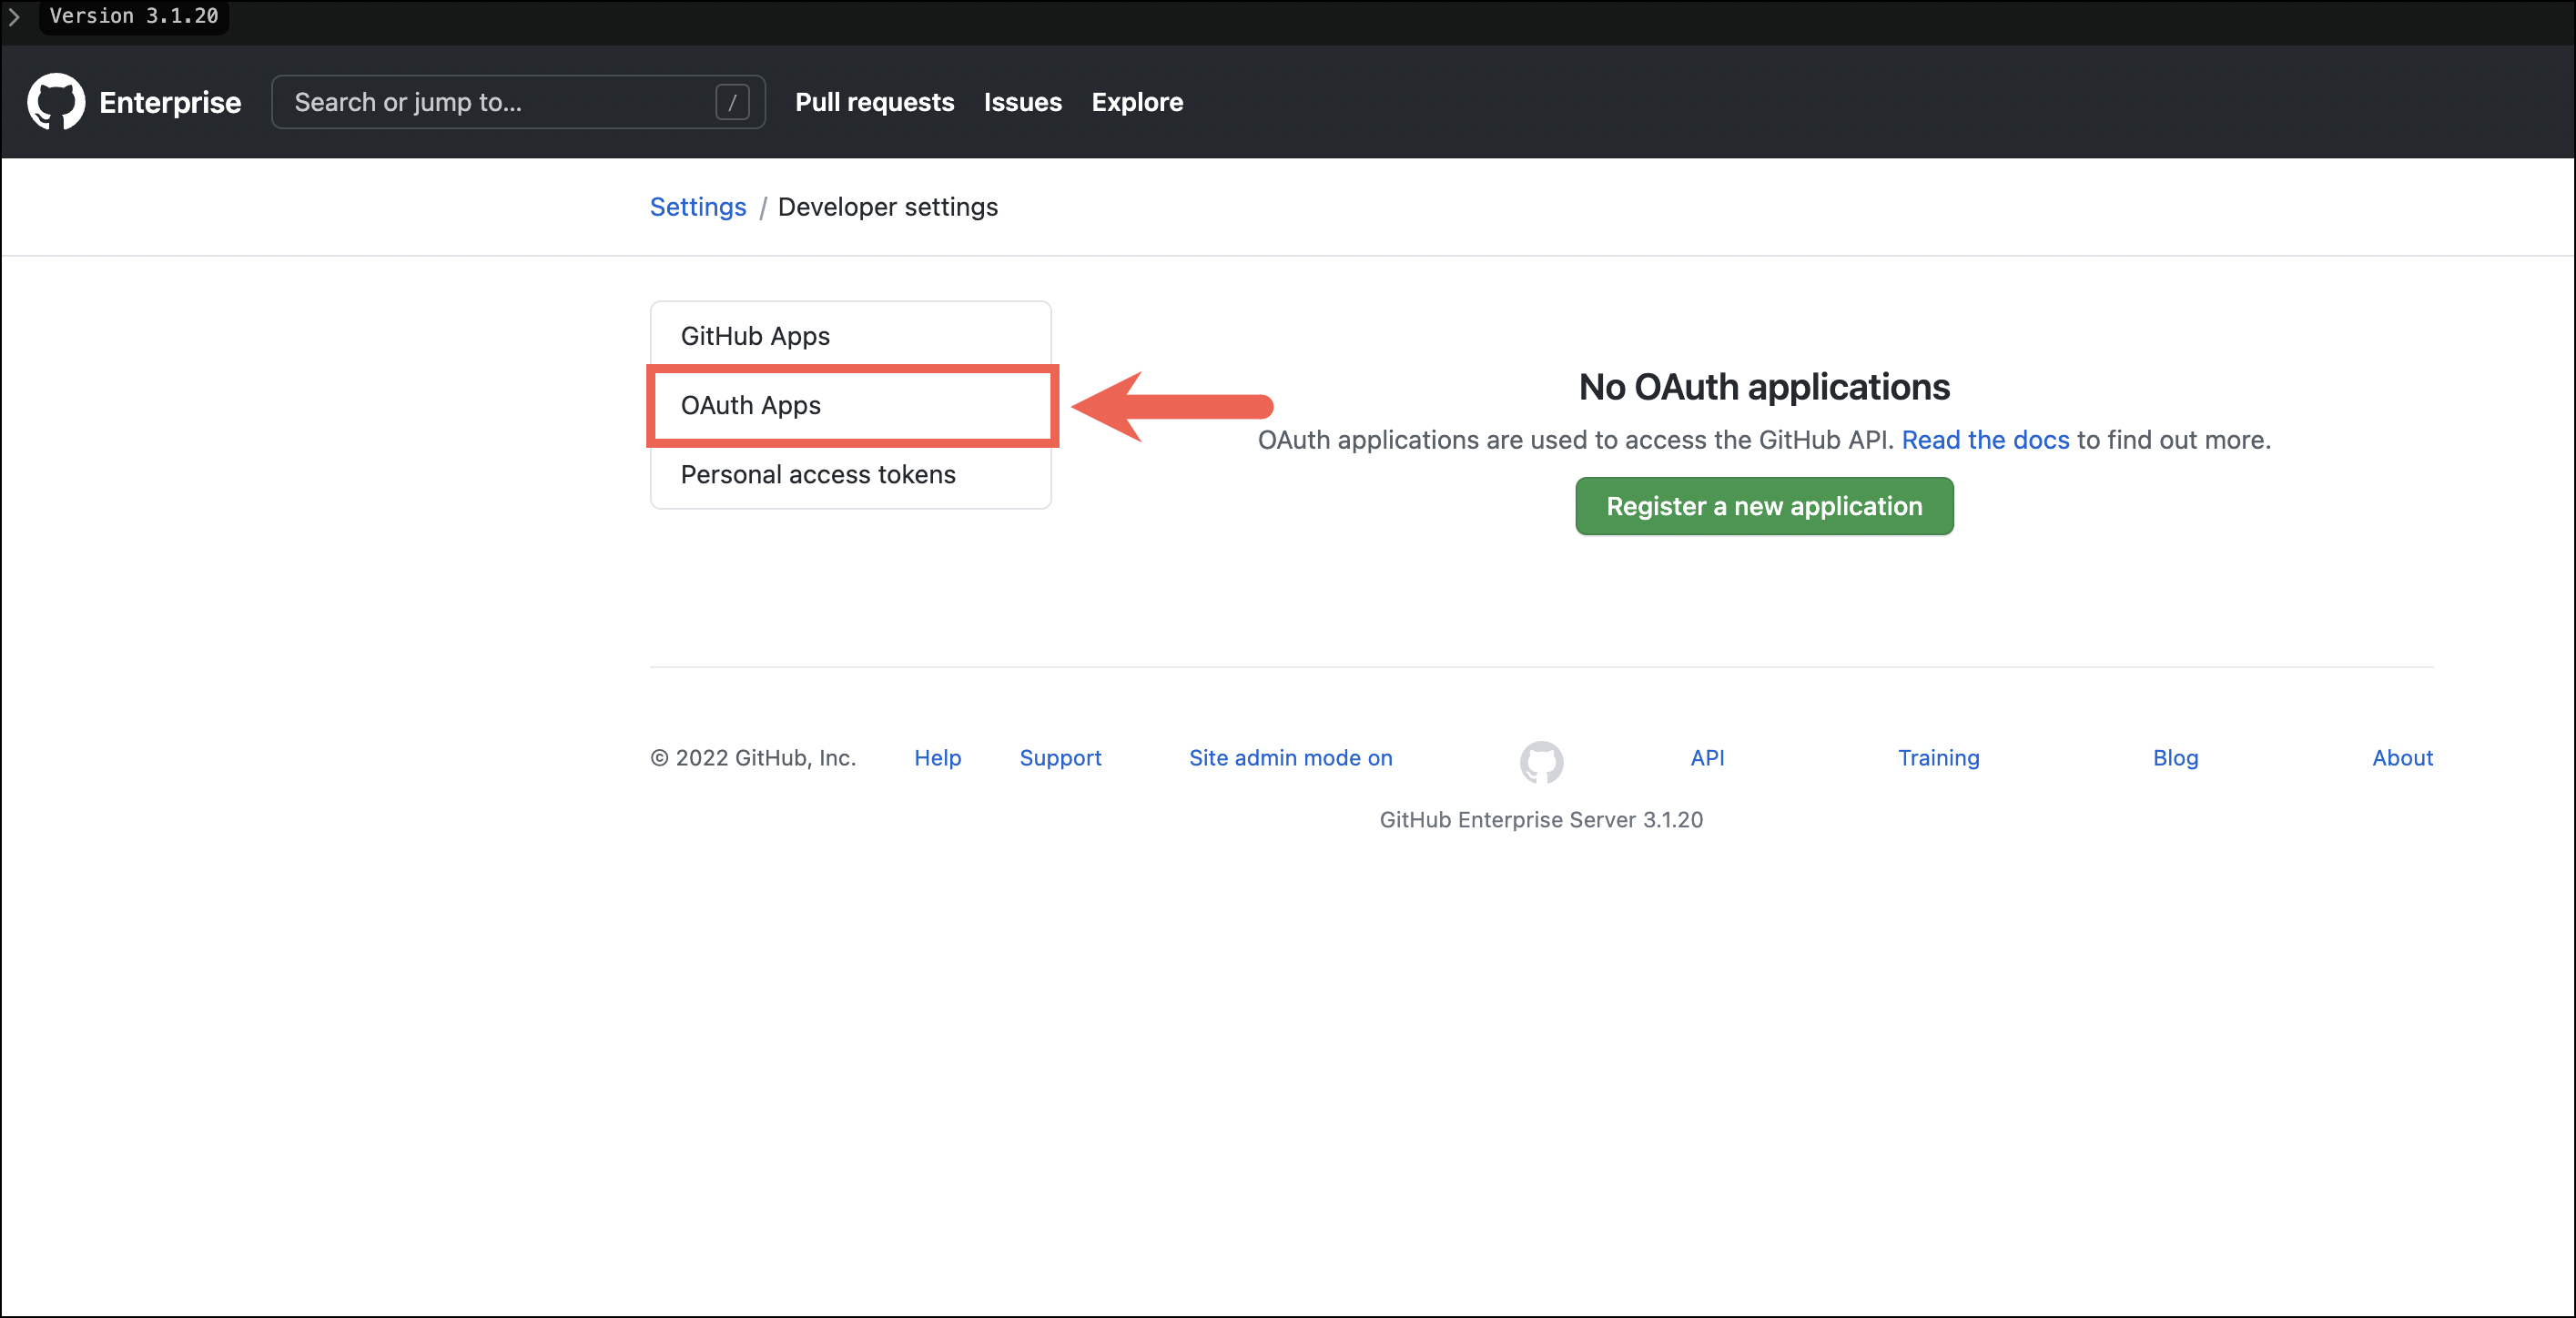
- Select OAuth Apps and click on Register a new application.

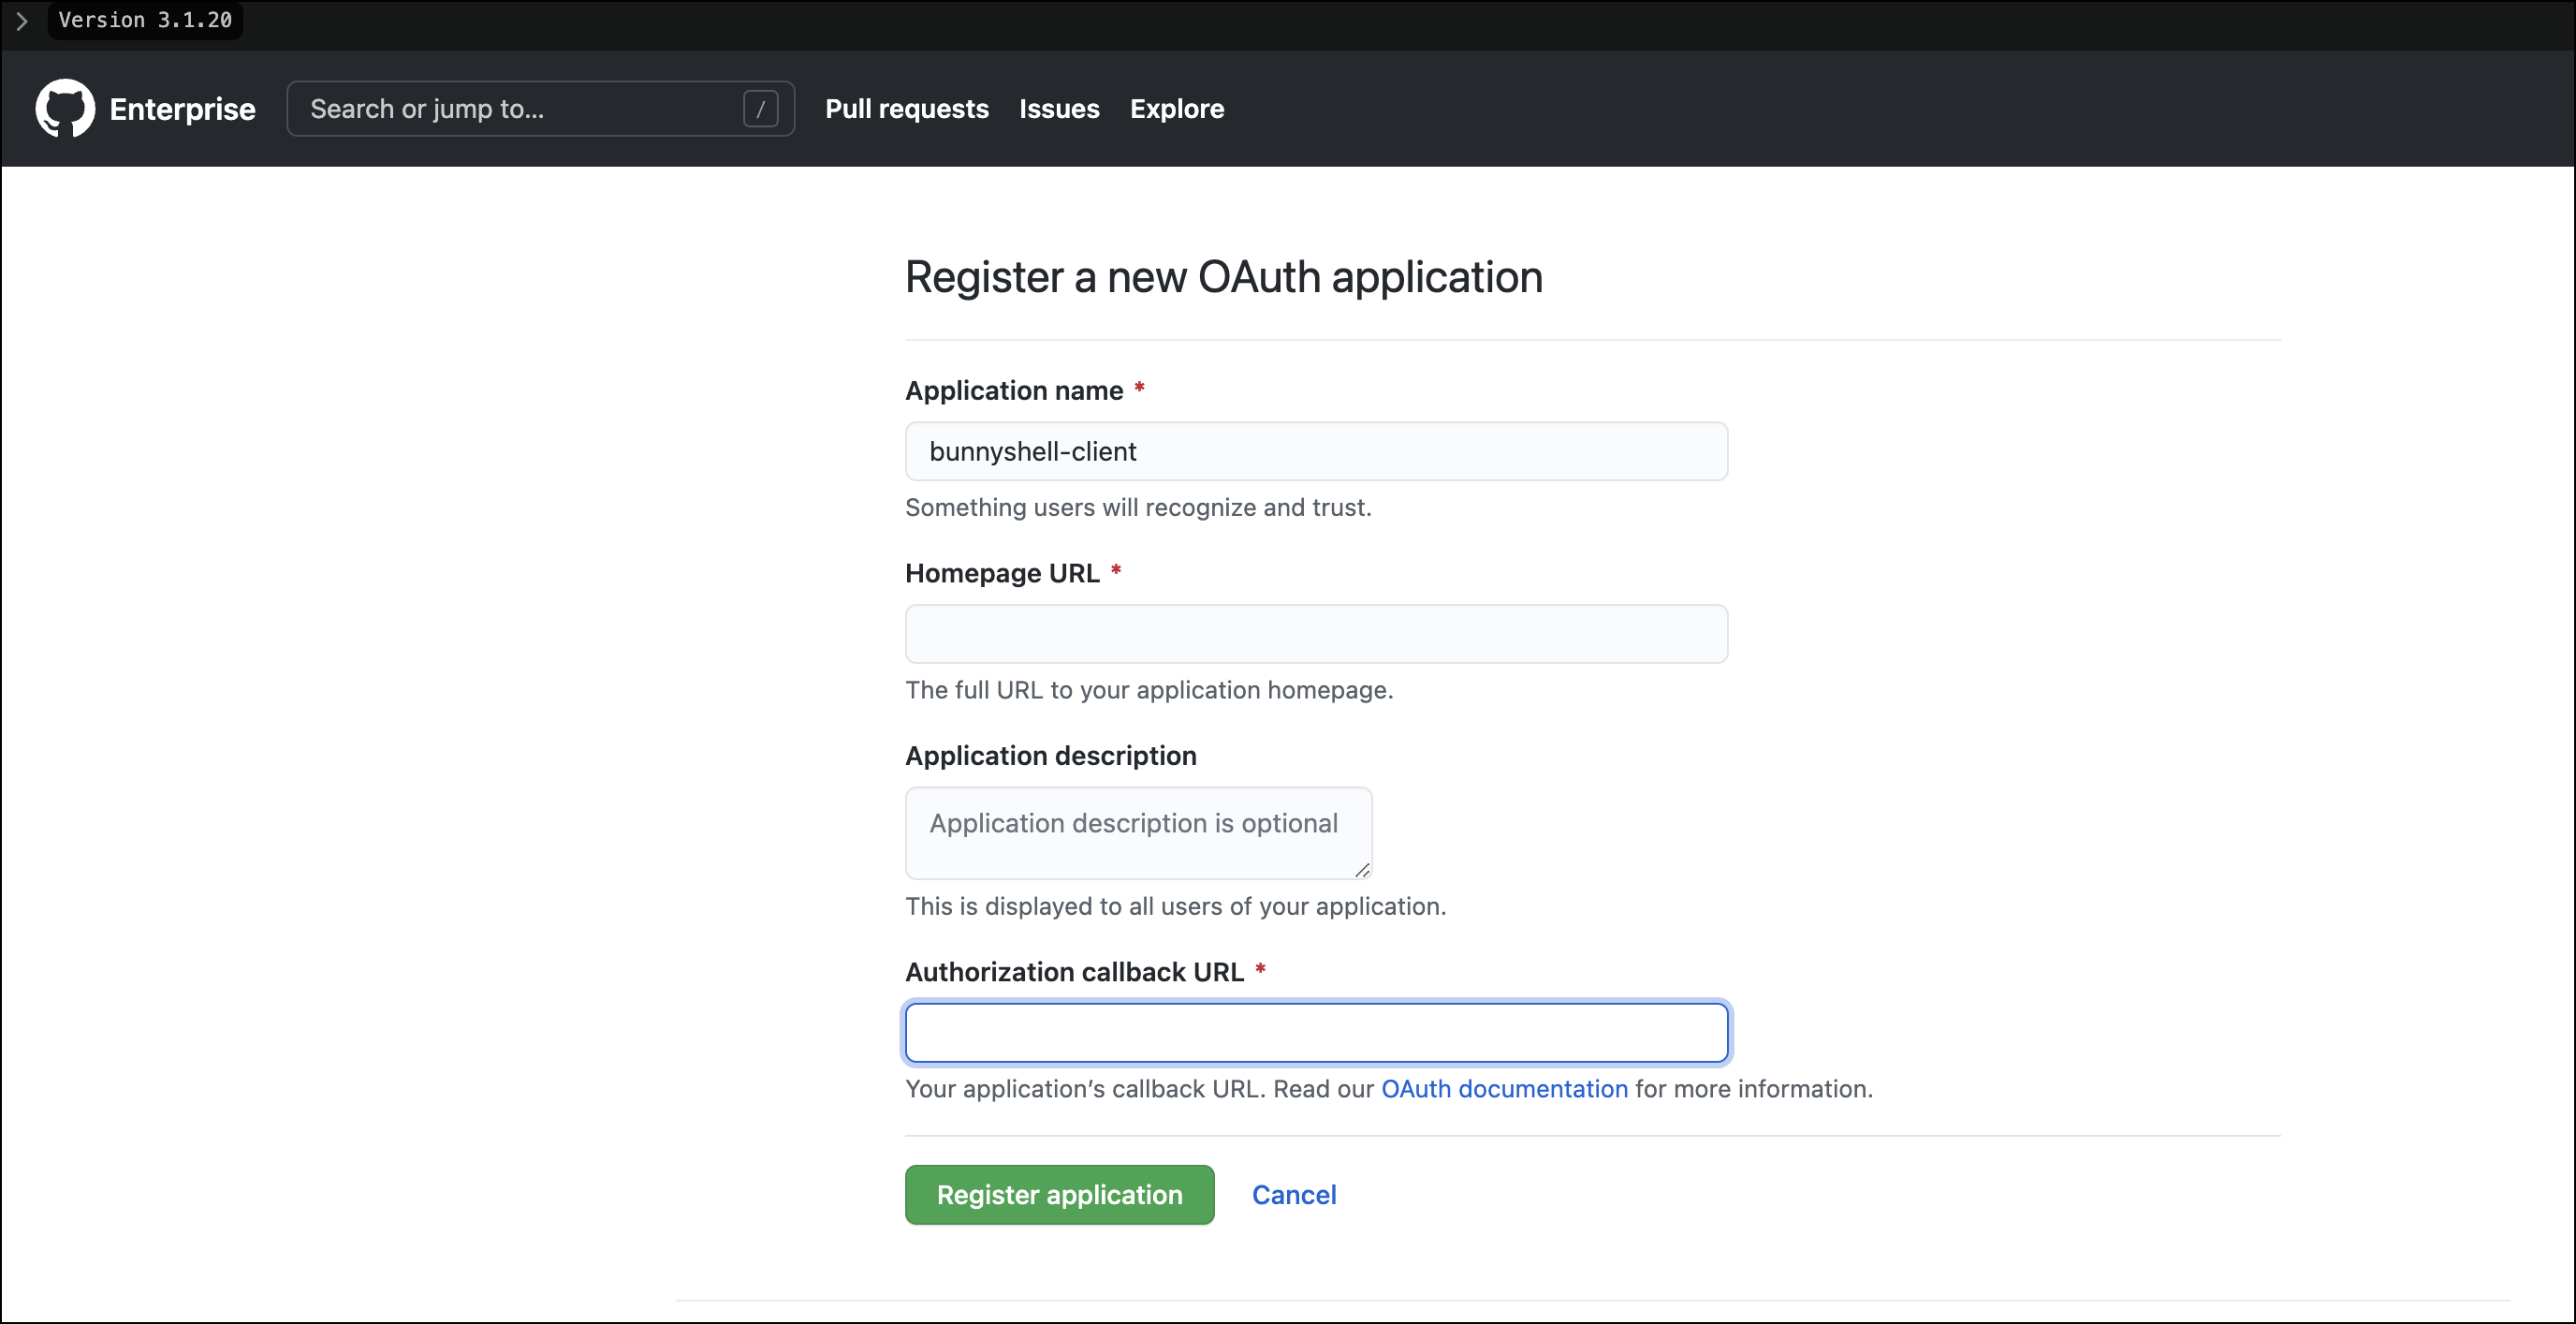
- Provide a name for your application.

-
In the Homepage URL, type the following:
https://environments.bunnyshell.com. If you wish, you can choose to also provide a description for your application. -
In the Redirect URL field, type the following:
https://environments.bunnyshell.com/github-response -
Click Register Application. You are then redirected to a screen where the details of the application are shown.
-
Copy the Client ID displayed, then Generate a new client secret. You will need these when accessing the Bunnyshell interface.
Connecting your private Github to Bunnyshell
After creating the application, go to Bunnyshell and log into your account.
-
Click Integrations on the left-side menu.
-
Select Git integrations.
-
Click Connect git account and select Private Github. In the new screen, provide the following credentials:
- In the OAuth Login URL field type the URL of your application.
- Paste the Client ID in its corresponding field.
- Paste the Client Secret in its corresponding field.
- Finally, click Connect. Your private Github instance is now connected to Bunnyshell.
Updated 5 months ago
